
How to fit a new skirting board
First, choose your skirting board, considering both aesthetics and durability. You'll want to measure your room meticulously to make sure you buy enough material. Sand the boards smooth and then cut them to size. For outside corners, cut at a 45-degree angle using a mitre box for precision; for inside corners, use a coping saw to achieve that seamless fit. Apply a strong adhesive and secure the boards with screws into wall studs. Fill any nail holes with wood filler, sand, then paint or stain to match your decor. Perfecting these procedures will make all the difference in the final appearance of your room.
Key Takeaways
- Measure and cut skirting boards to fit the room's perimeter, using a mitre box for precise angles at corners.
- Secure the skirting board by applying adhesive and fastening with screws into the wall studs.
- Pre-paint or stain skirting boards before installation to ensure a clean, finished look.
- Use a coping saw for accurate cuts on internal corners to ensure tight, seamless joints.
- After installation, fill any nail holes with wood filler and sand smoothly before applying a final coat of paint or stain.
Preparing Skirting Boards
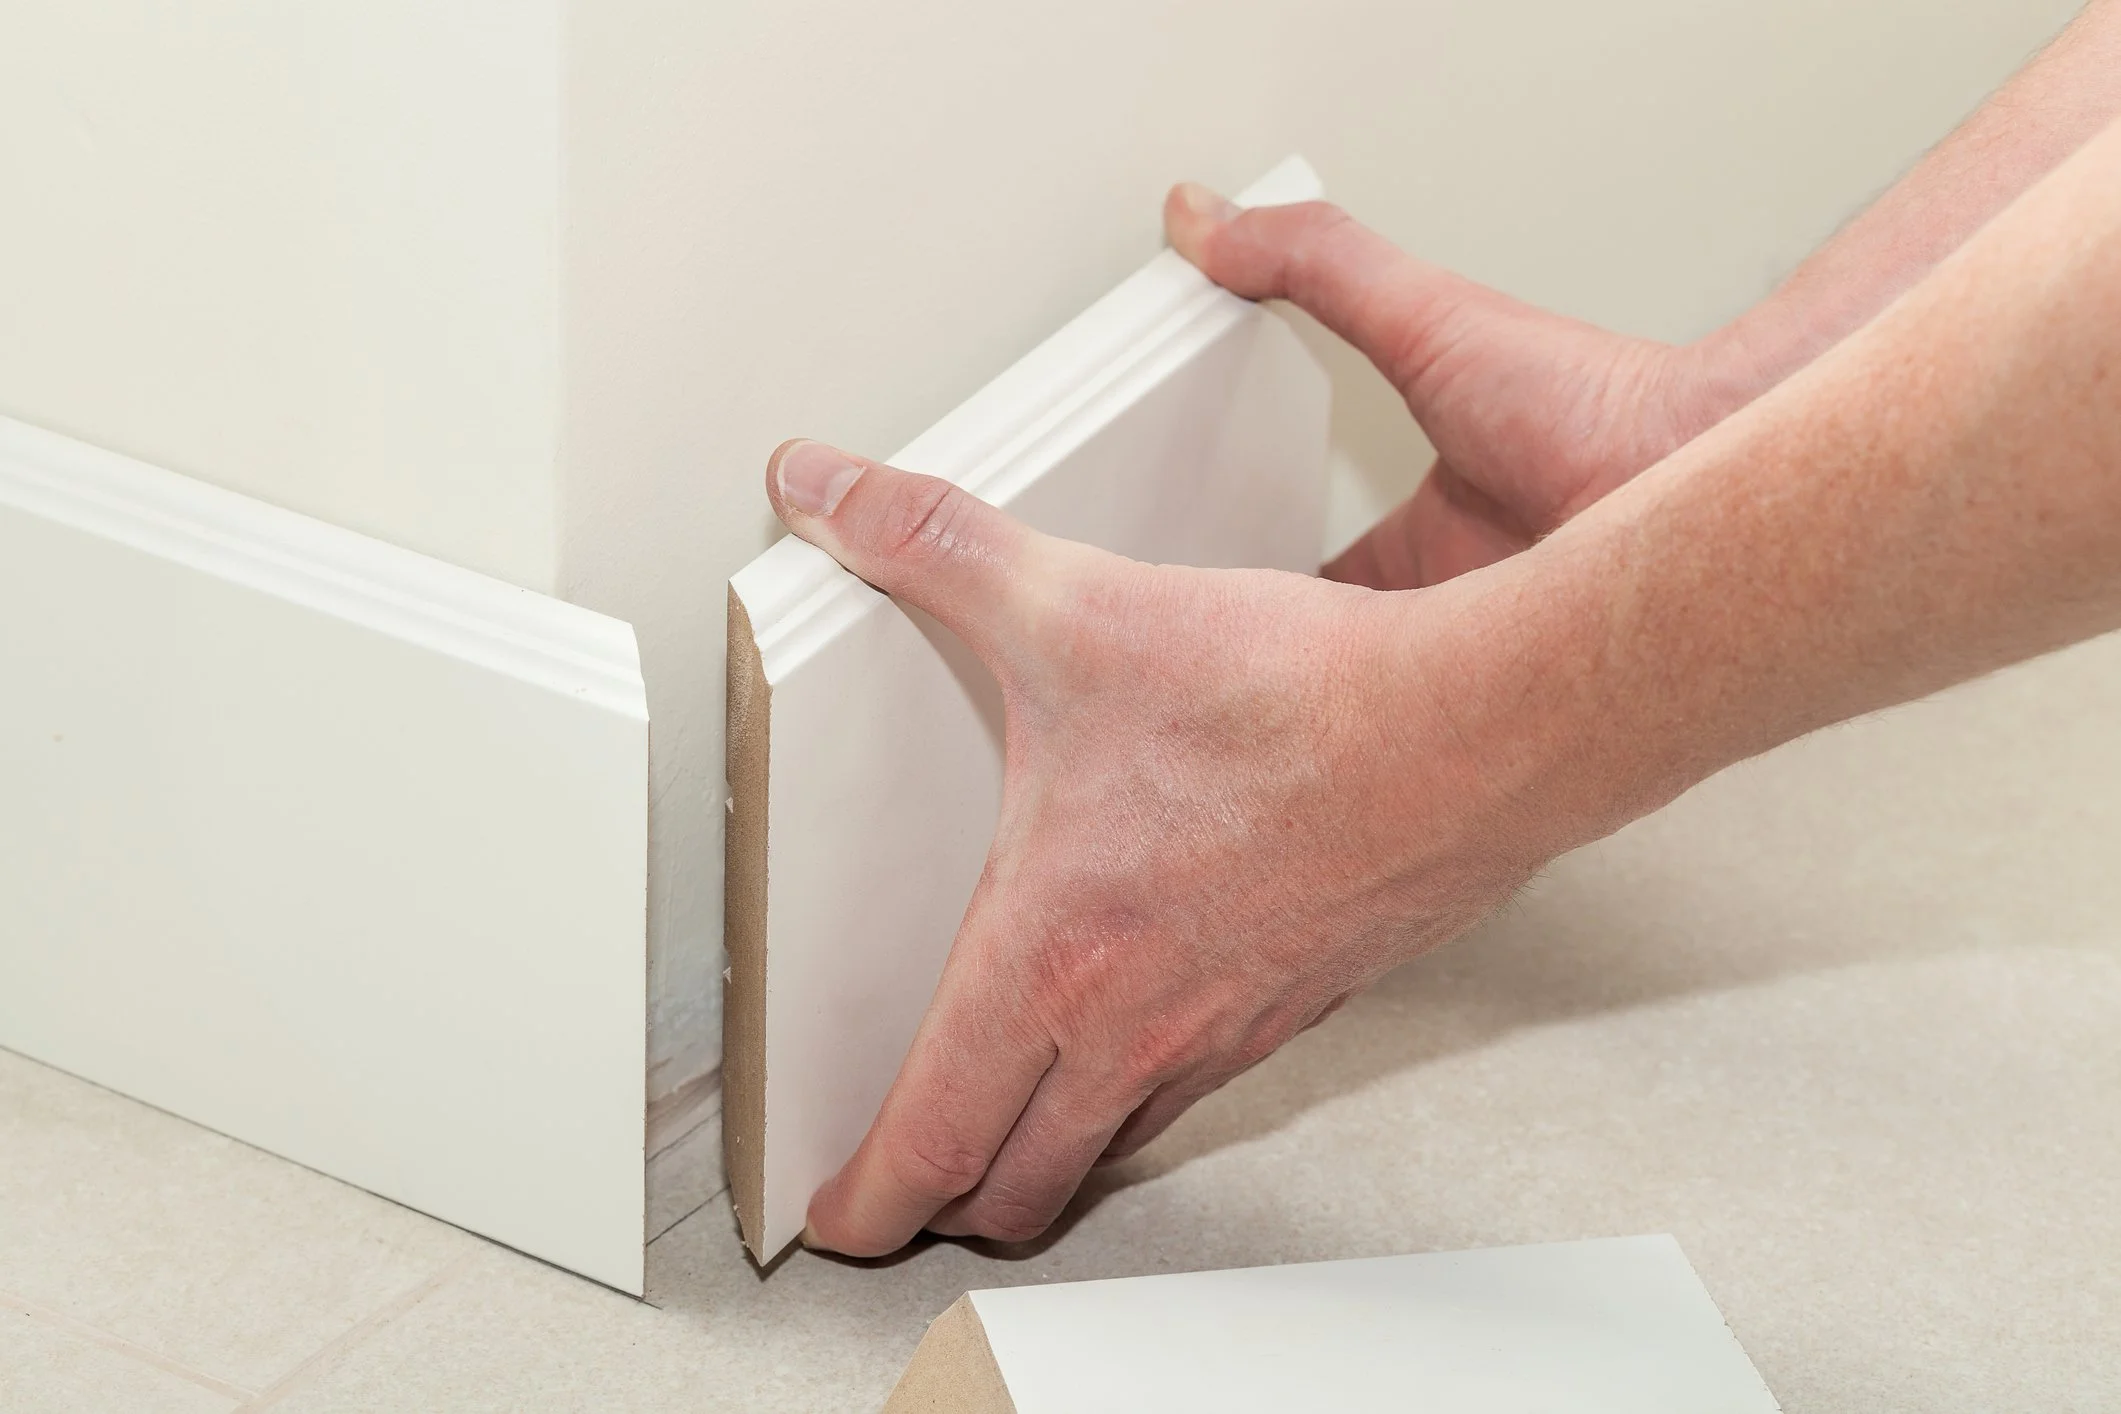
Before you begin fitting your new skirting boards, make sure they're properly sanded, particularly if you're working with softwood or hardwood, to achieve a smooth, flawless finish. Selecting the right material is important for both aesthetics and durability. You've got options ranging from MDF, which typically doesn't need sanding, to more traditional choices like softwood and hardwood, which often require more prep work. When considering skirting board styles, think about the overall look you're aiming for—do you prefer something sleek and modern or more detailed and traditional? This choice will impact not only the visual appeal but also how you'll tackle cutting angles and scribing corners. Sanding tips include using a fine-grit sandpaper to gently smooth out any rough edges or surface imperfections. This prep step is necessary, as it prevents paint from peeling and guarantees a polished end result. When cutting, always aim for precise angles. For external corners, you'll typically use a 45-degree cutting angle, ensuring neat, sharp joins. For scribing internal corners, the technique involves carefully cutting along a profile to make one board nest perfectly into another, minimizing unsightly gaps. This attention to detail will make all the difference in your installation's final appearance.Measuring and Cutting Techniques
Having prepared your skirting boards, you'll now focus on accurately measuring and cutting them to guarantee a perfect fit. Start by taking precise angle measurements for each corner of the room. Remember, external corners typically require a 45-degree mitre joint, so set your mitre box accordingly. For internal corners, you'll employ scribing techniques to make sure a seamless fit without visible gaps. When it comes to cutting, first, measure the wall length and mark your skirting board. For precision cutting, secure the board in your mitre box. If you're tackling an external corner, cut at a 45-degree angle—this forms the mitre joint, which will align perfectly with the adjoining piece. For internal corners, cut one board straight at 90 degrees and use the coping saw to shape the end of the adjoining piece, following the profile of the skirting. Coping saw tips are important here: keep the blade perpendicular and follow your pencil line closely. After cutting, always check the fit before moving on to the next piece. Adjustments might be necessary, and that's fine—taking your time here will pay off with professional-looking corner joints that fit snugly together.Installing Skirting Boards
Once you've accurately cut your skirting boards, it's time to fix them firmly to the walls. Before diving into installation, consider the skirting board materials—be it MDF, softwood, or hardwood—as each might impact your approach, especially when thinking about maintenance advice down the line. Here's a quick guide to guarantee a smooth installation: 1. Choose the Right Style: Match the skirting board styles with your room's aesthetic. Whether it's a simple chamfered design or something more ornate, the right style can enhance your room's character. 2. Pre-Painting: It's easier to paint the boards before installation. Use a paint suited for your material; this avoids common mistakes like uneven coats or paint on the walls. 3. Avoiding Common Mistakes: Ensure all measurements are double-checked to avoid unnecessary gaps. Don't rush the cutting process—accurate cuts are essential for a clean look. 4. Long-term Maintenance: Regular dusting and a gentle clean with a damp cloth can preserve the appearance of your skirting boards. Be mindful of the materials used as some might require specific cleaning agents.Securing Skirting Boards
After preparing and cutting your skirting boards, it's time to fasten them securely to the walls to make sure they align perfectly and stay in place. Begin by locating the studs in your wall using a reliable stud finder. This is important as fastening the skirting directly into studs ensures a stronger hold. Mark these spots lightly with a pencil. Next, apply a bead of strong adhesive along the back of each skirting board. This adhesive application helps hold the board in place before you permanently affix it. Press the board against the wall, aligning it carefully at the desired height. Now, use your screwing technique. Pre-drill holes into the skirting board at the marked stud locations to prevent the wood from splitting. Drive screws through these holes into the studs to firmly anchor the skirting board. For additional support, consider nail hammering into the areas between the studs. Use a nail set to countersink the nails for a cleaner finish.Finishing Touches
To give your newly installed skirting boards a polished look, start by filling any nail holes with wood filler. Once dry, sand the surface smoothly to prepare for painting. Choosing the right finish and applying the correct painting techniques can greatly enhance the aesthetic and guarantee durability. Here's how you can achieve that professional finish: 1. Choose Your Finish: Select a paint or stain that complements your room. High-gloss paints are durable and easy to clean, making them ideal for areas with high traffic. For a more subtle look, consider eggshell or satin finishes. 2. Apply Primer: If you're working with bare wood, especially hardwoods, applying a primer is essential. It helps in achieving an even finish and enhances paint adhesion. 3. Painting Techniques: Use a fine-bristle brush or a small roller to apply paint. For the best results, apply at least two coats, allowing ample drying time between each. Edge carefully along the top of the skirting to avoid paint on the walls. 4. Decorative Options and Maintenance: Consider adding decorative mouldings to your skirting boards for a customized look. Regularly dust and wipe down your skirting boards to preserve their appearance.Final thoughts
Now that you've mastered the art of fitting skirting boards, your room is transformed, boasting a finish that's nothing short of breathtaking. With every cut precise and every joint seamless, your new skirting boards not only enhance the beauty of your space but also stand as proof of your skill and dedication. Enjoy the stunning results of your hard work—the perfect frame to your room's masterpiece! Remember, a well-finished room starts from the ground up.Call now to get your free quote
If you need help with any Decorating call us today
T: 01225 466237 | M: 07970 541989