
How to remove wallpaper
Wallpaper, once the pride and joy of many a household, has a tendency to lose its charm over time. Perhaps it's the wear and tear, the outdated design, or maybe you're simply ready for a fresh look. Whatever the reason may be, when the time comes to give your room a new lease of life, removing the old wallpaper is often the first step.
While the task may initially seem daunting, rest assured that with the right approach, a good dose of patience, and a little elbow grease, it's entirely achievable. And that's precisely why we've written this guide - to provide you with a clear, step-by-step roadmap to tackle wallpaper removal in a way that's both efficient and respectful of your walls.
In the following sections, we'll delve into everything you need to know, from understanding the different types of wallpaper and their unique removal techniques to the essential tools you'll need, and of course, the all-important process itself. We'll also cover how to prepare your space to minimize mess and potential damage and provide guidance on post-removal cleanup and wall treatment.
So, roll up your sleeves, and let's get started on transforming your space into the blank canvas that awaits your next design vision!
Understanding Different Types of Wallpapers
Before you rush off to grab your tools and get started, it's crucial to understand the type of wallpaper you're dealing with. This is because the method of removal can greatly depend on the wallpaper's material and application process. Here, we will discuss the most common types of wallpapers and how their removal processes may differ.
Traditional Wallpaper: This is typically made of paper and is the most common type found in homes. Traditional wallpaper is often more challenging to remove because it's typically glued to the wall. Soaked with a special solution or hot water, it must then be scraped off.
Vinyl-Coated Wallpaper: As the name suggests, this type of wallpaper is coated with a layer of vinyl for durability and ease of cleaning. When it comes to removal, the vinyl layer must usually be peeled away before the underlying paper layer can be soaked and scraped off.
Peel-and-Stick Wallpaper: A popular choice in recent years due to its easy application and removal, peel-and-stick wallpaper adheres to the wall much like a sticker. While it's generally easier to remove, it can still leave a sticky residue that needs to be cleaned off the wall.
Textured or Foil Wallpaper: These are speciality wallpapers that have added elements for aesthetic appeal. Textured wallpaper can be made from a variety of materials, and foil wallpaper often has a metallic finish. These types can be a bit trickier to remove and may require more effort or a different approach.
Paintable Wallpaper: This wallpaper is designed to be painted over, allowing for custom color schemes. It's often thicker than other types and might require additional soaking time to effectively remove.
Understanding your wallpaper type is the first step towards an effective removal process. Once you've identified what you're working with, you'll be able to select the best tools and techniques to get the job done. In the next section, we'll explore the various tools you'll need for your wallpaper removal project.
Essential Tools and Materials for Wallpaper Removal
Equipped with the right tools, you'll find that the job of removing wallpaper becomes considerably more manageable. Here's a list of essential items you'll need to gather before you begin:
Scoring Tool:This handy device creates tiny perforations in the wallpaper, allowing your removal solution to penetrate and loosen the adhesive. It's particularly useful for thick or vinyl-coated wallpapers.
Wallpaper Removal Solution:Commercial solutions are available, or you can make your own with equal parts vinegar and hot water. This will help dissolve the wallpaper glue. Note that for tougher jobs, an enzyme-based wallpaper stripper might be more effective.
Spray Bottle or Garden Sprayer: You'll need this to apply your wallpaper removal solution. A garden sprayer can be particularly useful for larger rooms.
Scraper or Putty Knife:This tool will help you peel and scrape off the wallpaper once the adhesive has been loosened. Make sure the edges are smooth to prevent damage to the walls.
Sponge and Bucket:These will be used for washing down the walls after the wallpaper has been removed, to clean off any remaining adhesive.
Drop Cloths or Plastic Sheeting:These are essential for protecting your floors and furniture from the wet, sticky mess that comes with wallpaper removal.
Stepladder:Depending on the height of your walls, you might need a stepladder to reach the top edge of the wallpaper.
Safety Equipment:Don't forget your protective gear! Gloves will protect your hands, and goggles will keep the removal solution out of your eyes.
Once you have all your tools and materials ready, you're set to start the removal process. But before we dive in, we'll first discuss how to prepare your space to minimize disruption and ensure a smoother, cleaner removal process. We'll tackle that in the next section.
Preparing Your Space
A little preparation goes a long way in ensuring a smooth wallpaper removal process. By taking time to properly set up your workspace, you can prevent unnecessary mess and potential damage to your belongings and fixtures.
Clear the Room: Begin by removing as much furniture as possible from the room. For larger items that can't be moved, push them to the centre of the room, away from the walls.
Protect Your Floors and Furniture: Lay down drop cloths or plastic sheeting to protect your floors from drips and debris. If you have any furniture remaining in the room, cover it with plastic sheeting as well.
Remove Wall Fixtures: Take down any wall art, light fixtures, switch plates, and outlet covers. This will make the wallpaper removal process easier and prevent damage to these items.
Ventilate Your Room: Proper ventilation is essential, especially if you're using a commercial wallpaper removal solution. Open windows and doors to allow for air circulation. If your room lacks adequate ventilation, consider using a fan.
Identify Wall Damages: If there are any visible damages on your wallpapered wall such as cracks or holes, take note of them. These areas might need extra care during the wallpaper removal process to prevent further damage.
Test Your Wallpaper: Before you get started with the full removal process, try peeling a small section of wallpaper in an inconspicuous area. This will give you a better understanding of how firmly it's attached and what method might work best for removal.
Preparation might feel like a tedious step, but it's a crucial one that can save you time and headaches down the line. Now that your space is ready, we can move on to the main event - removing the wallpaper. We'll walk you through this in our next section.
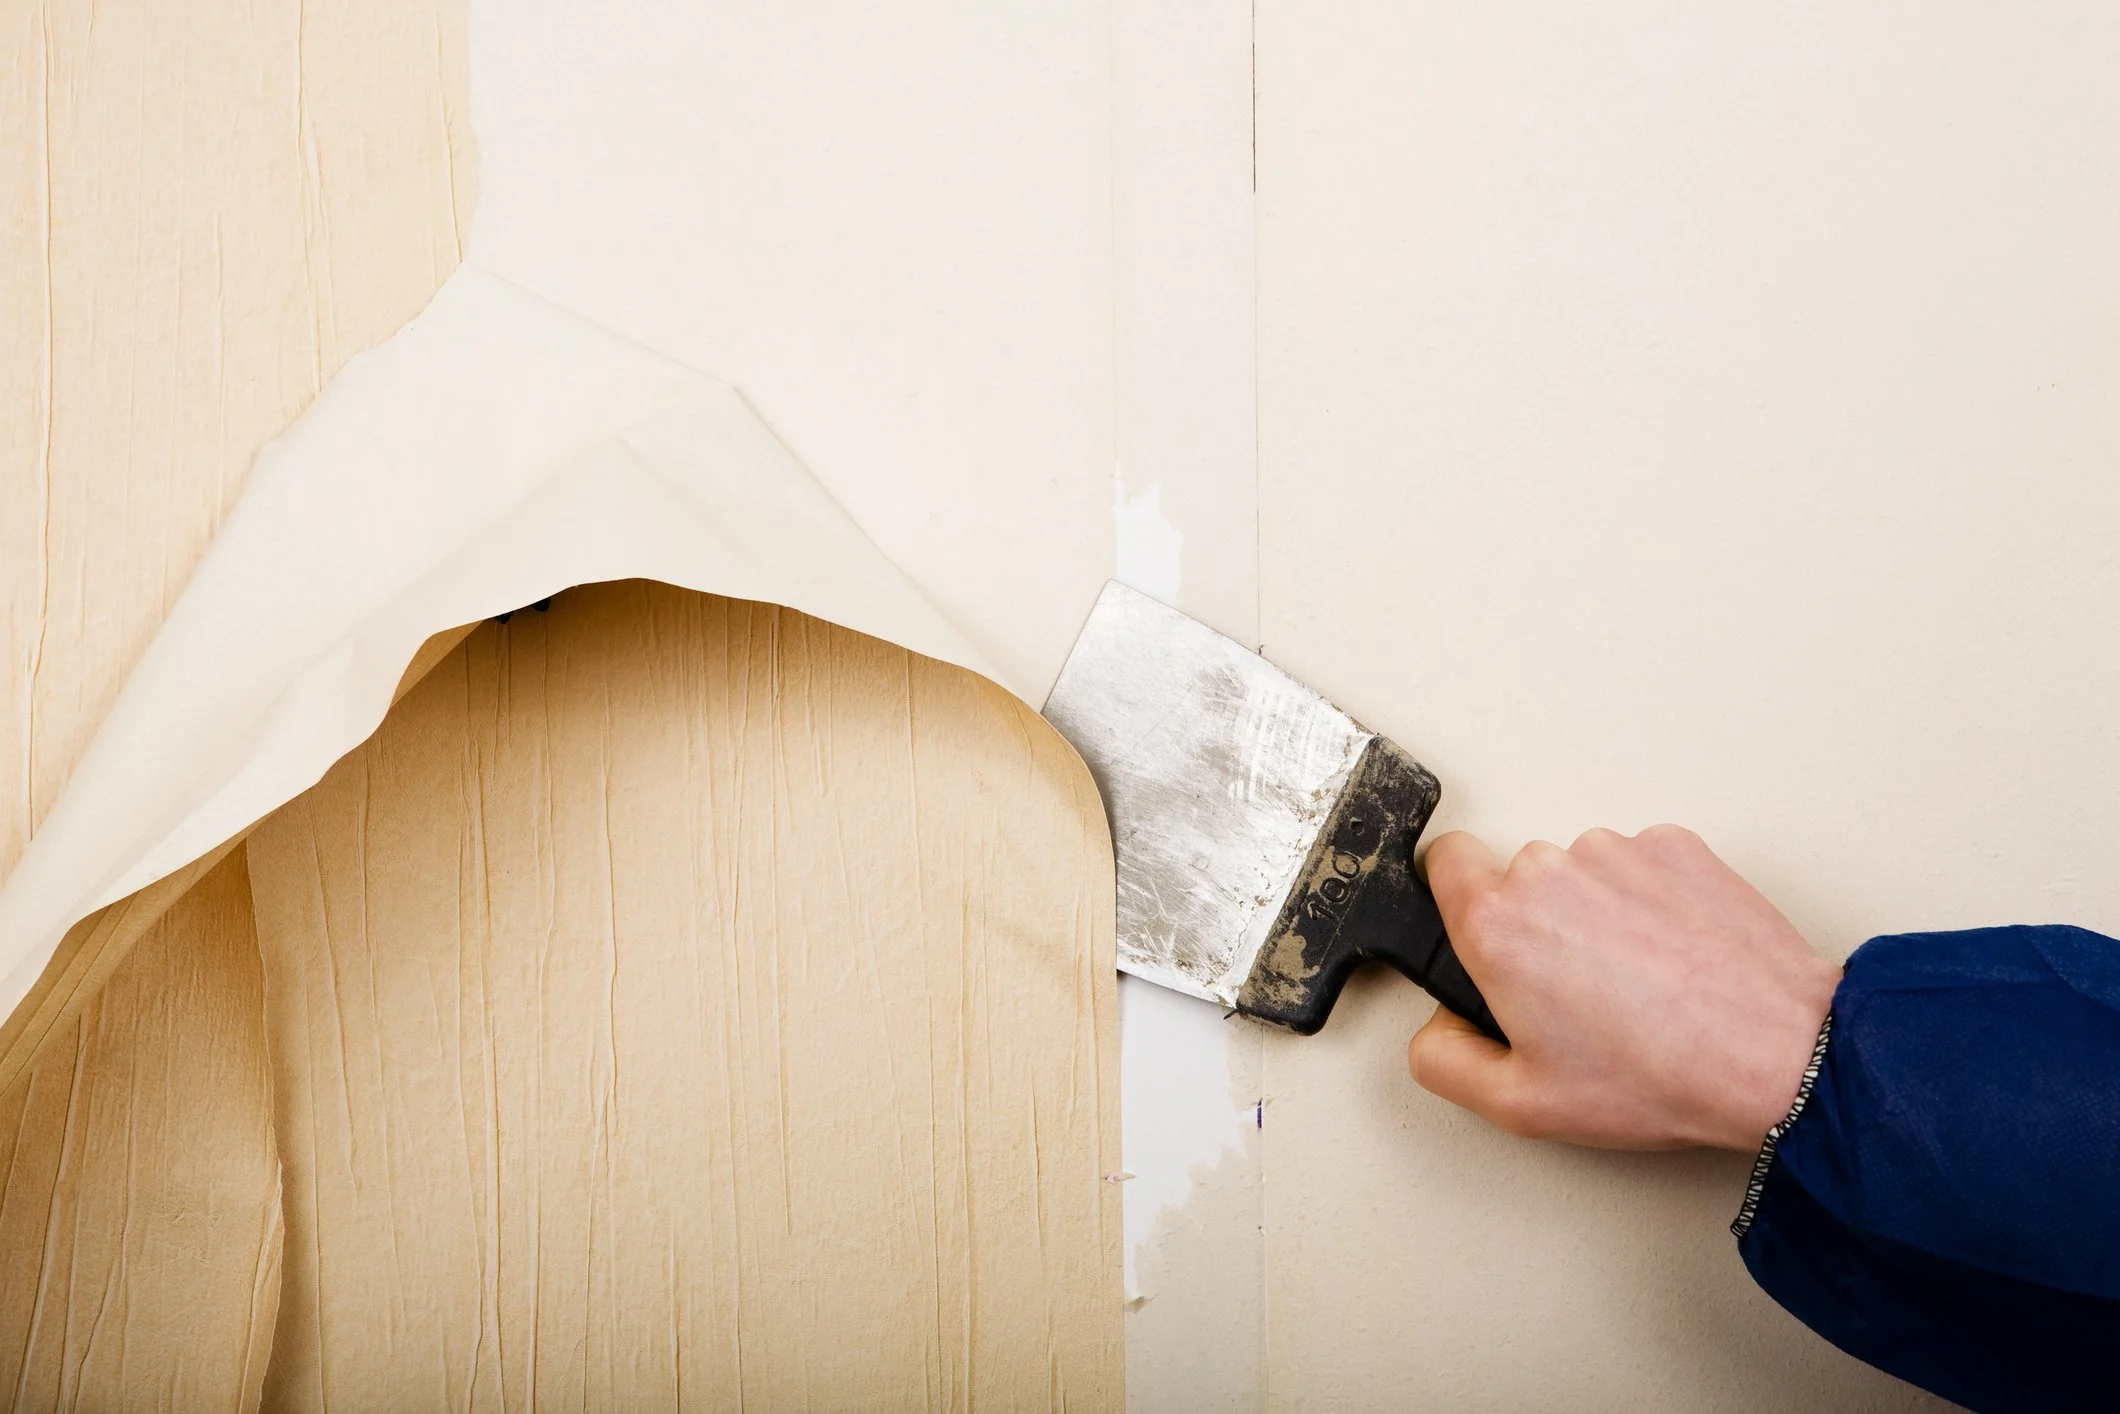
Removing the Wallpaper
With all the preliminary steps out of the way, it's time to roll up your sleeves and get down to business. The method for removing the wallpaper will depend largely on the type of wallpaper you're dealing with. Here are the general steps to follow for each type:Traditional Wallpaper
- Start by scoring the wallpaper with your scoring tool. This will create small holes that allow your wallpaper removal solution to penetrate the adhesive.
- Spray your wallpaper removal solution onto a section of the wall. Allow it to soak in for a few minutes, giving it time to loosen the adhesive.
- Using your scraper or putty knife, gently scrape off the wallpaper. Always work from top to bottom and be careful not to gouge your walls.
Vinyl-Coated Wallpaper
- Begin by peeling off the vinyl layer from the wall. This should leave behind a paper layer.
- Follow the same steps as for traditional wallpaper to remove the remaining paper layer.
Peel-and-Stick Wallpaper
- Start at a corner and slowly peel the wallpaper off the wall. If it's difficult to remove, try heating it lightly with a hairdryer. This can help soften the adhesive and make removal easier.
- Once the wallpaper is off, clean the wall to remove any adhesive residue. A solution of warm water and mild detergent should do the trick.
Throughout this process, remember to be patient. Some areas may require several applications of your removal solution and a bit of elbow grease. But with persistence, the wallpaper will come off. If you encounter any stubborn areas or challenges, we have tips for those in the following section.
Post-Removal Cleanup and Wall Treatment
After the last piece of wallpaper has been scraped off, you might feel like celebrating - and you should, as that's the bulk of the job done! However, don't forget about the essential final steps: cleaning up and treating your walls. This process is important to ensure your walls are in the best condition for whatever comes next, be it a fresh coat of paint or new wallpaper.
Cleaning the Wall Surface
- Start by removing any remaining adhesive residue from the walls. You can do this using a sponge and a bucket of warm water mixed with a small amount of mild detergent.
- Rinse the wall thoroughly with clean water and allow it to dry completely. This is crucial to ensure no detergent or water is trapped under your new paint or wallpaper.
Repairing Any Damages
- If you've discovered any small holes or cracks during the wallpaper removal process, now is the time to repair them. You can use a ready-mixed wall filler for this task. Apply the filler, let it dry, then sand it smooth.
- For larger wall damages, you may need to apply a patch or seek professional help.
Primer Application
- Before you move on to painting or applying new wallpaper, applying a primer is an essential step. The primer helps seal the wall and provides a smooth surface for the paint or wallpaper to adhere to.
- Make sure to choose a primer suitable for your wall type and the paint or wallpaper you're planning to use.
Once you've completed these steps, you're ready to move on to the fun part - redecorating your space! Whether you've chosen a fresh coat of paint or a trendy new wallpaper, your well-prepared walls are now ready for their transformation.
Final Thoughts
With the last remnants of adhesive wiped clean and your walls primed and ready for their new look, you've successfully navigated the challenge of wallpaper removal. It's a task that often seems daunting at the outset, but as we've seen, it's entirely achievable with a little knowledge, the right tools, and a good dose of patience.
In this guide, we've walked through everything from understanding your wallpaper type to gathering your tools, preparing your space, and finally, the step-by-step removal process. We've also covered the all-important post-removal cleanup and wall treatment.
With these steps behind you, you've not only removed a layer of old wallpaper but also gained a new set of DIY skills. So go ahead and celebrate this accomplishment! You're now ready to embark on the exciting next stage - transforming your space into something fresh and uniquely yours.
Remember, the process of redecorating your home is a journey, and every step, even the ones that involve a little extra elbow grease, brings you closer to realizing your vision. So here's to your newly blank canvas and the endless design possibilities that await!
As always, we invite you to share your experiences, ask questions, or seek further advice—give us a shout. Happy decorating!
Call now to get your free quote
If you need help with any decorating, call us today.
T: 01225 466237 | M: 07970 541989