
How to Strip Wallpaper and Prepare Internal Walls
Stripping wallpaper might seem daunting, but with the right approach and tools, it can be a satisfying part of your decorating project. Whether you're preparing your walls for a fresh coat of paint or new wallpaper, here's a guide from your local experts
Materials and Tools Needed
- a steam wallpaper stripper
- various scrapers
- quick drying filler
- sandpaper
- or if you prefer and electric sander
- a bucket of warm water, and a sponge.
Gathering Your Tools and Materials
Before you start, ensure you have all necessary tools at hand. A steam wallpaper stripper is invaluable for removing stubborn wallpaper efficiently. Different types of scrapers will help you tackle various textures and adhesions you might encounter. Quick-drying filler is essential for fixing any imperfections in your walls, ensuring a smooth base for your next layer of decor. Sandpaper or an electric sander will make smoothing down the walls easier, while a bucket of warm water and a sponge are needed for cleaning surfaces and aiding in wallpaper removal.
Understanding Your Wallpaper Type
The first step in the removal process is to assess the type of wallpaper you're dealing with. Woodchip wallpaper, for example, is notoriously difficult to remove due to its textured surface. Begin by using a scraper to gently remove the top layer of the wallpaper. This exposes the underlying adhesive to moisture, which is crucial for the next steps. It's important to approach this step with care to avoid damaging the wall underneath.
Softening the Wallpaper
The key to easy wallpaper removal is softening the adhesive that binds it to the wall. This can be achieved through the application of warm water or, more effectively, with a steam wallpaper stripper. Fill the device with water, allow it to heat up, then press the steam pad against the wallpaper. The steam penetrates the wallpaper, loosening the adhesive. This method is particularly effective for wallpapers that are resistant to scraping and soaking.
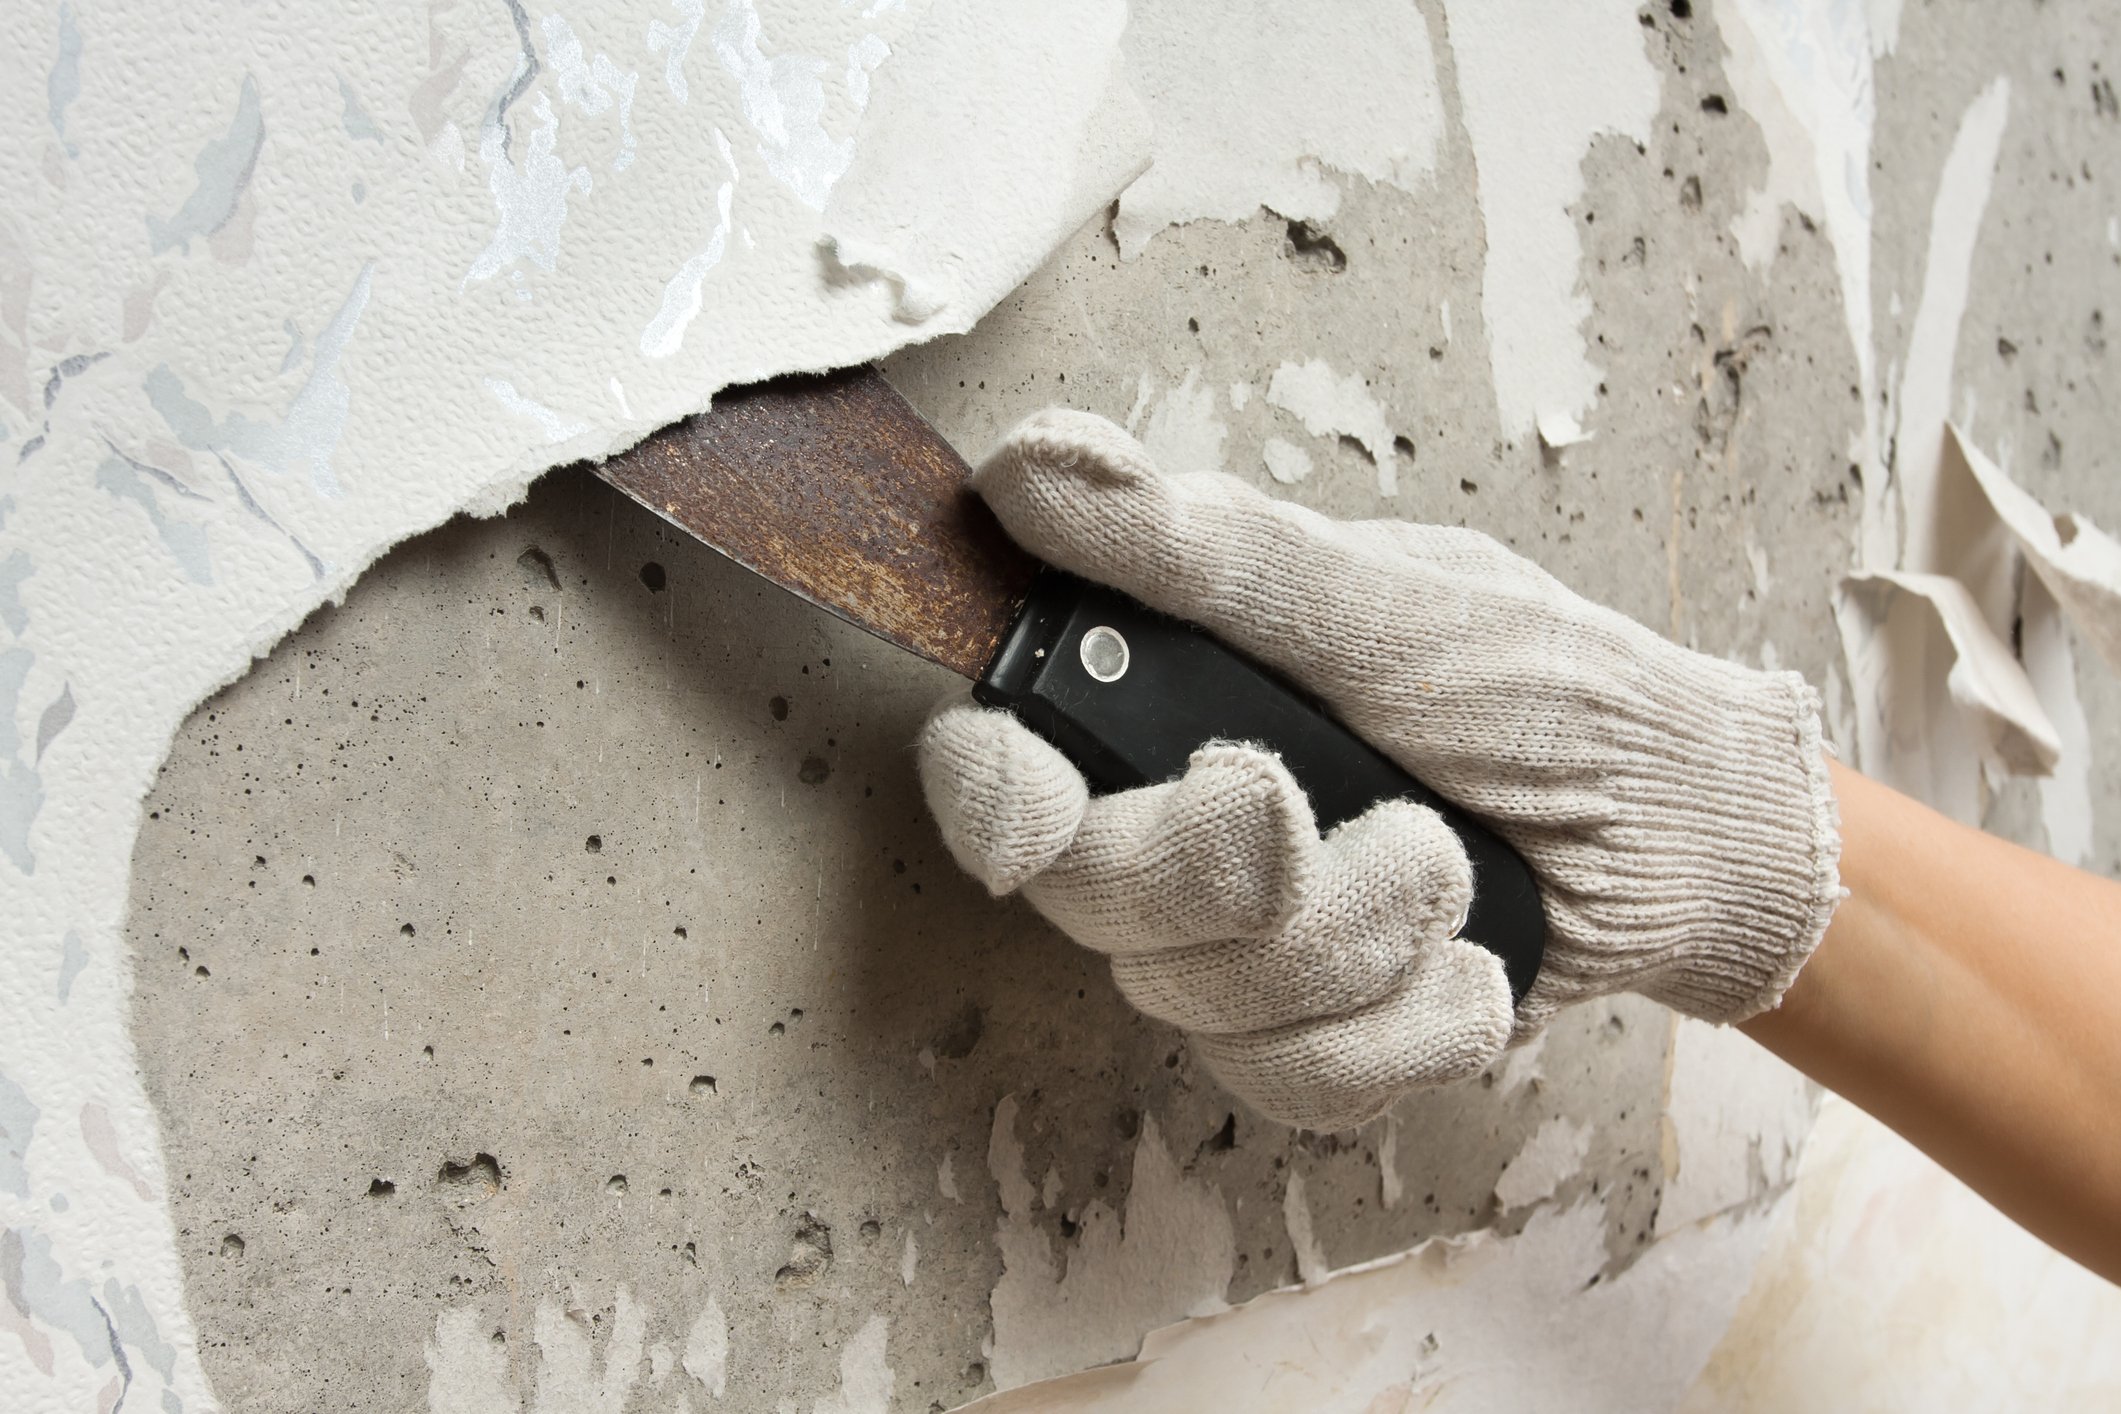
The Removal Process
Once the wallpaper is sufficiently loosened, it's time to strip it from the wall. This can be a messy job, but it's satisfying to see the old wallpaper come away, revealing the wall beneath. Use your scrapers to gently lift and peel the wallpaper from the wall. You may discover imperfections or damage to the plaster underneath, which will need to be addressed before you can proceed with redecorating.
Preparing the Wall
After removing the wallpaper, the next step is to prepare the wall for its new finish. Start by dusting off any residue with a lightly dampened brush. Next, use quick-drying filler to patch any holes or cracks, ensuring a smooth, even surface. Once the filler has dried, sand the area to remove any excess and create a smooth finish. If you're dealing with a large area or significant damage, an electric sander can save time and effort.
Sealing the Wall
The final step before redecorating is to seal the wall. This is done by applying a diluted PVA solution, which helps to ensure that your new paint or wallpaper adheres properly and evenly. This step is crucial for achieving a professional-looking finish that lasts.
Tools and Materials Needed for Hanging Lining Wallpaper
- your wall paper guide knife
- decorating scissors
- a scraper
- your brushes
- wall paper smoother
- a tape measure
- a pencil
- and adhesive to apply the paper with.
Hanging Lining Wallpaper: Steps
The first stage is to measure and cut your paper correctly. Once you have measured and you have got the correct size of your walls at home, allow an extra 4 inches both top and bottom to allow it to be cut nice and tight against the ceiling and the skirting board.
When cutting your paper to shape, make sure that you get a nice 90º degree cut on there, roll the paper back over the one below, line it up both top and bottom, then put a crease down one edge. Then using your decorating scissors, cut it down to length.
It is always wise to work out how many lengths of wallpaper you are going to require to do the full wall or full room. It is far easier and cleaner marking it out and cutting them down to size while the pasting table is clean.
Next, applying the wallpaper adhesive is really important, it can be put on two ways, one with a four inch paintbrush or the second way is with a roller. Either way you have got to cover the entire area of the paper, making sure you have got an equal amount all the way across.
Now you have pasted your paper to the full length of the board, what you are going to need to do is slide it along, it is okay to lap it on top of one and other and that allows you to slide the paper along and get to the other end.
Once you have pasted the whole length of paper it is very important to apply it to the wall straight away. Lining wallpapers can be fitted horizontally or vertically. Using you wallpaper smoother, start to come down the center to start with, then working out from left to right, making sure that there is no air bubbles and not too much adhesive behind the paper.
It is very important to trim the bottom of the paper down so that it is a nice snug fit to the skirting board. A great way of doing this is after using your wallpaper smoother, take it down as far as you can, nice and tight into the skirting board. And then get your scraper and just do a gentle line, be careful you don’t tear the paper, you just want to create a nice crease nice and tight to where the skirting board meets the bottom of the plaster.
Once you have got your crease, if you pull that away you should be able to identify exactly where it is. Taking your decorating scissors, slowly and carefully cut along your crease. Once the paper is in place and completed, using a damp cloth wipe down the walls either side.
When about to hang the last piece of wallpaper nice and tight into the corner. You will want to cut the width to size.
This is going to make it easier to paste up first and then also to apply it and cut it nice and snug into the corner. Now as mentioned earlier, the last piece is the smallest piece, and I want to give it a nice tight fit into the corner. But of course, corners are never perfectly square or level, so it is a great to use one of these decorating brushes to stab it in nice and tight into the corner and that kind of curves around the shape of the corner.
And then again score it using your scraper, and then you can trim it down using you decorating scissors the same way as you do the top and the bottom.
And that is your lining paper now complete, let this fully dry out for about a week and then it is your choice whether you want to paint it or wallpaper over it.
Need More Help?
At Paintworks Decorating Service, we're dedicated to providing top-notch painting and decorating services in Bath. Our team, led by Dan, prides itself on delivering high-quality workmanship and exceptional customer service. If you're looking for advice or need professional assistance with your decorating project, don't hesitate to reach out.
Call now to get your free quote
If you need help with any Decorating call us today
T: 01225 466237 | M: 07970 541989